
Technical
Watch The Install Video:
Install Sunbelly In 5 Easy Steps
-
Step 1 - Screen Posts
Mount Screen Posts 36” apart. Ensure Posts are straight and exactly 36” apart or marginally more for 36” Screen to fit snug.
Measure post to post, not base to base. Fasten to deck substructure using (4) structural deck screws / Screen Post.

-
Step 2 - Post Skirts
Place one half of Post Skirt into place on base of Post with seams on the sides.
Place second half of Post Skirt into place, interlocking the male and female metal connectors.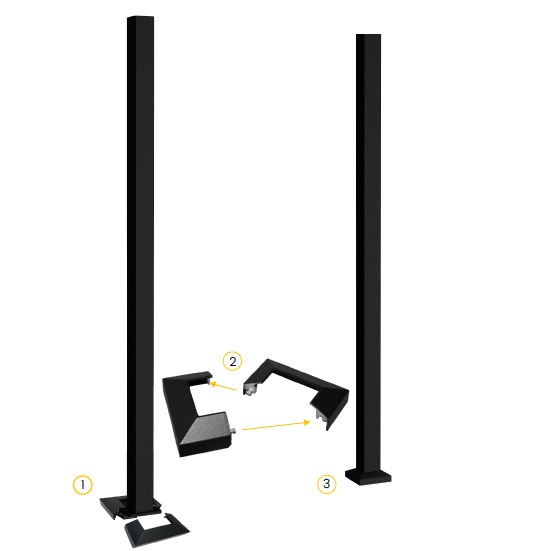
-
Step 3 - Post Caps
Place Post Caps on top of Post.
Press down firmly or tap with a rubber mallet to ensure secure fit.
Fasten (1) supplied screw through hole in Post Cap.
-
Step 4 - L Brackets
Butt L Brackets against the bottom edge of Pillar Caps and the center of each Post.
Fasten (5) self-tapping screws through L Brackets and into each Post.An awl or 1/8” metal drill bit can be used to drill pilot hole in L Bracket.
We recommend drilling about ½” below the factory hole on the other side of the L Bracket to make fastening easier. Tape can be used to hold L Brackets in position while fastening.
-
Step 5 - Install Screen
Place Screen against L Brackets ensuring all 5 holes line up.
Place supplied (10) bolts through holes and place nut on backside. Tighten until firmly secure.

-
Enjoy!
Congratulations, you are now ready to enjoy your Sunbelly Privacy Screens!
Be sure to send us photos of your final project. We’d love to see how it turned out!
